INCISOR®
Optimization Checklist.
A final pass for a smaller download, faster startup and smoother frames. Most items take a few minutes. Work from top to bottom and tick things off as you go. This page remembers your ticks.
Download smaller and faster to start Runtime smoother while it plays Open How on any item for the details.
Trim the download
Make sure every graphic you ship is needed, sized right and packed well.
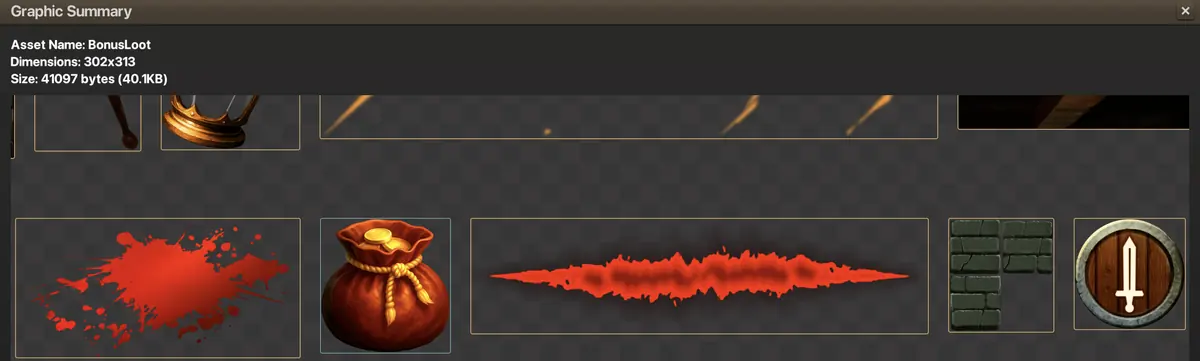
Publish, then open Publishing Analysis → Graphic Summary… to see every graphic the build will load, grouped by loading tier.
How
What to look for, and what to do about it:
- Graphics that aren't used: delete them, or turn off
includeWhenBuiltin the Assets panel if you want to keep them in the project. - Graphics larger than they ever appear on screen: lower their
resolutionScale(03). Roll over a graphic to see its dimensions. - Near-duplicates: keep one and reuse it, for example by flipping, tinting or scaling it in place of a second copy. Incisor® already removes exact duplicates for you.
- Related graphics on the same tier that aren't on a sprite sheet: give them the same
spriteSheetname (04). - Large areas that never appear on screen: clear those areas to transparent in the source art. Automatic trimming then cuts them out of the shipped texture.
Move anything the first screen doesn't need into a later tier, so players can start sooner.
How
In the Assets panel, select a folder and set Asset → loadingTier. Everything inside the folder goes to that tier. One folder per tier keeps it easy to follow.
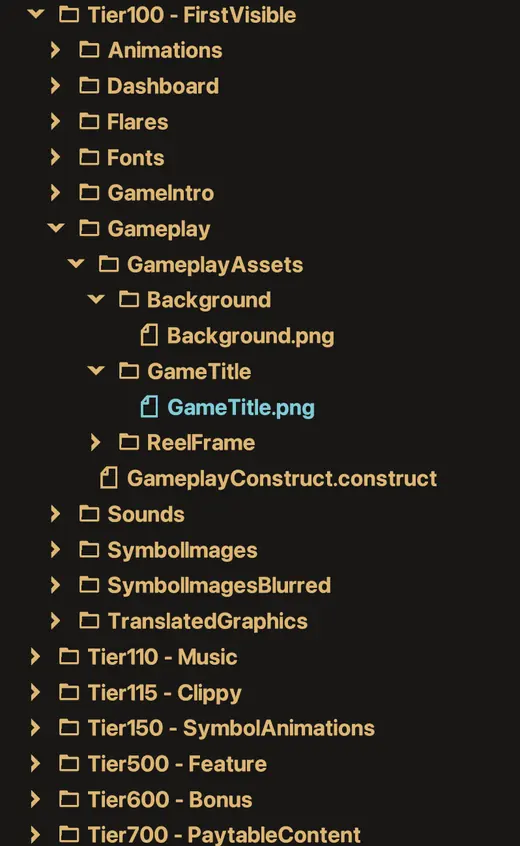
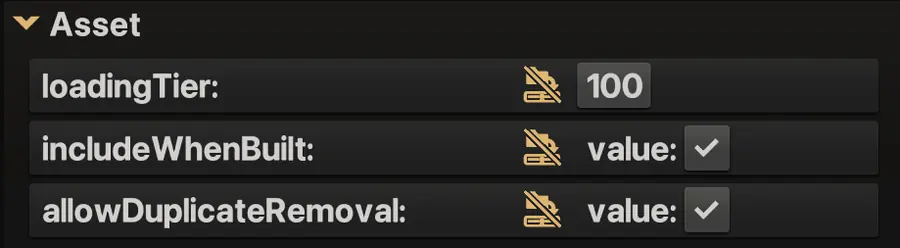
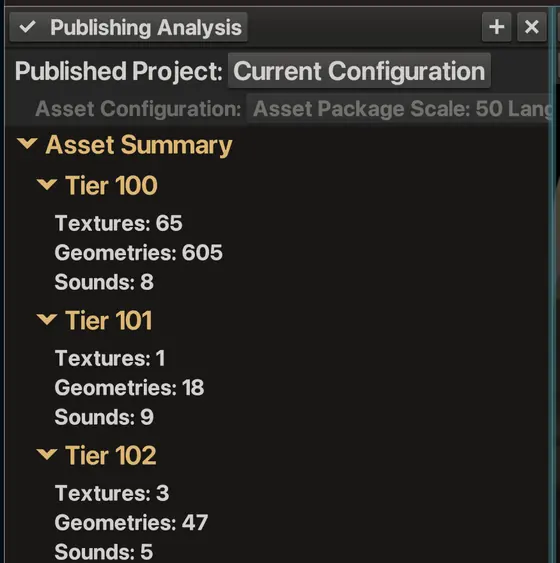
loadingTier is the first setting in the Asset section.Publishing Analysis → Asset Summary then shows what each tier contains. The first tier is the one every player waits for.
Full guide: Lazy Loading Content in Incisor® →
Your source art stays full size. Set resolutionScale on an image or a folder, and the published build downloads a smaller copy instead.
How
In the Assets panel, open Resolution → resolutionScale. A value of 0.7 ships the image at 70% of its size. Leave applyAssetPackageScaling on so the per-device scale from 08 still applies.

Packing related images into one sheet lets them share a single palette, which multiplies the savings from paletted compression.
How
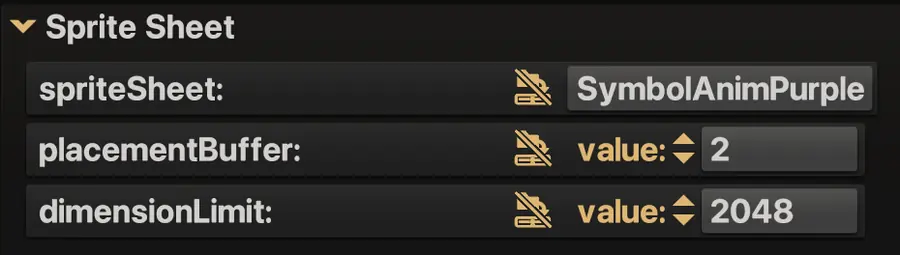
In the Assets panel, open Sprite Sheet → spriteSheet and pick an existing sheet or New Sprite Sheet…. Every image with the same sheet name is packed together. Set it on a folder to pack the whole folder.
Group images that share a loading tier (this is required). Images with similar colors make the best sheets, because they share the palette well.
Ship only what the player needs
Most of these are checkboxes in Project Settings, under the configuration you publish.
Optional parts of Incisor®, such as sounds, particles, Spine, reels and video, only need to ship if you use them.
How
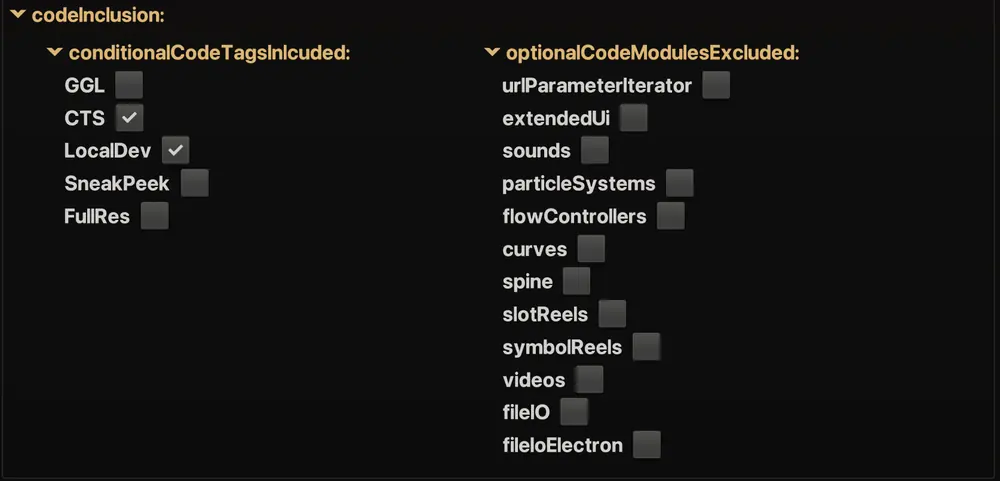
In Project Settings → configurations → your configuration → codeInclusion → optionalCodeModulesExcluded, tick every module the project doesn't use.
Testing code, cheats and debug logging shouldn't ship to players.
How
Put code that only you need between CODE.includeIf___unpublished and CODE.includeEnd___unpublished. For code that belongs only in some configurations, define a conditional code tag and tick it under conditionalCodeTagsIncluded (see the screenshot in 05).
CODE.includeIf___unpublished;
    // testing info: never published
    console.log("TEST: spin result", this.outcome.totalWin, "lines won:", this.outcome.wins.length);
CODE.includeEnd___unpublished;

CODE.includeIf___LocalDev;
    // only in configurations with the LocalDev tag ticked
    nc.appEvents.keyboardEvent.addCallback(this, "cheatKeys");
CODE.includeEnd___LocalDev;This makes the published code smaller and harder to read.
How
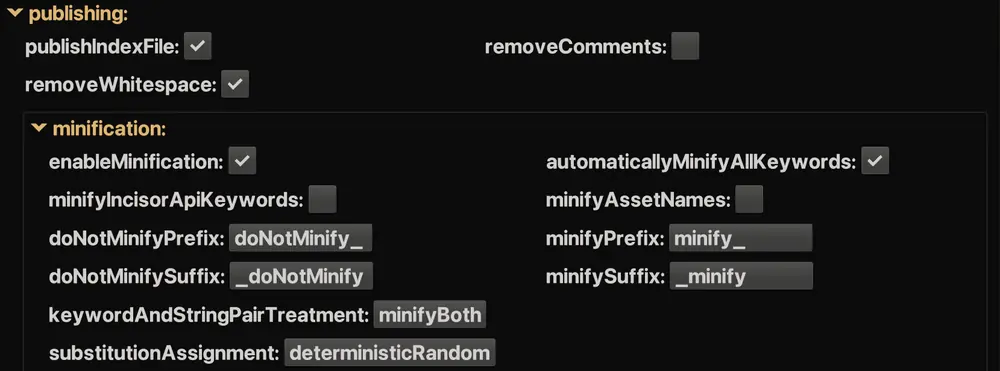
Under the configuration's publishing settings, turn on removeComments, removeWhitespace and minification → enableMinification. These only affect published builds. Your code in development stays exactly as you wrote it.
- Whitespace removal needs semicolons at the end of every statement. Only turn it on if every statement in your code ends with one.
- Exclude names from minification if outside code relies on them, such as RGS calls and other external integration names. Minification renames identifiers, which would break those connections. List them in
Utilities/MinificationLists/DoNotMinifyLists/DoNotMinifyList.json, or name them with a do-not-minify prefix or suffix (doNotMinify_and_doNotMinifyby default; you can change both in theminificationsettings). To protect a whole block, wrap it inCODE.preserve___beginandCODE.preserve___end. - Keep a running do-not-minify list. Every time you use an external API (RGS, analytics, platform SDKs and so on), add its names to
DoNotMinifyList.jsonright away, and carry the list from project to project. Then minification is ready to go when you publish. - Prefer to opt in? The usual approach minifies everything and excludes a few names. For the reverse, turn off
automaticallyMinifyAllKeywords. Then only names listed inMinifyList.json, or named with the minify prefix or suffix (minify_/_minifyby default), get minified. It's less common, but it makes preparing for minification easier.
Minification touches almost all of your code, so test the published, minified build thoroughly. Play through the whole project and check every external integration.
Phones don't need desktop-sized art or top-quality sound.
How
First, list the values you want to offer in Project Settings → assetConfigurationDefinitions, separated by commas. For example, add 35 to assetPackageScale for a lower-resolution package.

Then, in the configuration you publish, add one supportedAssetConfigurations entry for each device class, picking its assetPackageScale and soundQuality from those values. The first entry is the default.
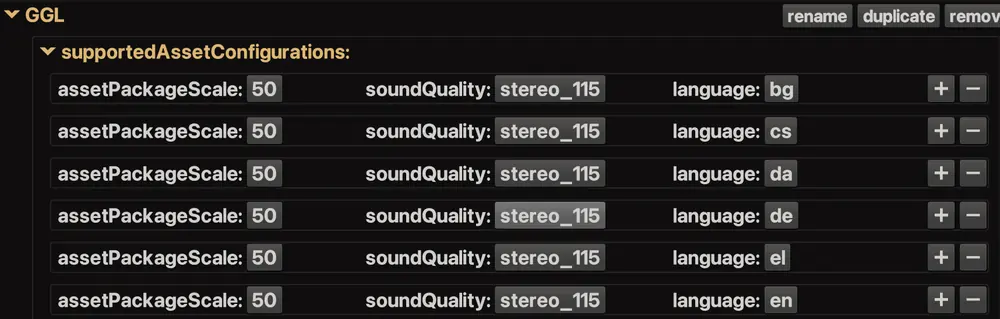
Then pick one at startup in ProjectCode/PreloadConfiguration/PreloadConfiguration.js. Incisor® doesn't detect device classes, so that check is yours to write:
function preloadConfiguration(projectConfiguration)
{
    // ...keep the template's code...

    // Your own device check. The result must match an entry in supportedAssetConfigurations.
    const isSmallScreen = Math.min(screen.width, screen.height) < 500;
    if (isSmallScreen) {
        projectConfiguration.assetConfiguration.assetPackageScale = "50";
        projectConfiguration.assetConfiguration.soundQuality = "mono_55";
    }
}Fonts can ship with only the characters your text uses, for each language.
How
- Give each TextBox and TextAssembly a
phraseIDfrom the Transcript instead of a plain string. - In Project Settings → fontReduction, turn off
includeStandardCharactersWhenPublished, and keepincludeTranscriptCharacterson. - For characters that only appear in code-built text, like numbers and currency, add them to that font's
alwaysIncludeTheseCharacters.

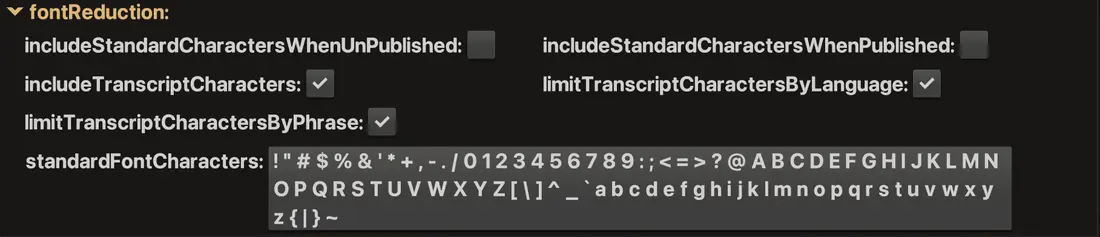
To check the result, click Font Reduction… in the Transcript panel. It lists the exact characters kept for each font in each language.
Keep every frame light
Anything that runs every frame adds up fast. Make sure only what the player can see, or is waiting on, is doing any work.
Every callback on fixedUpdate or screenUpdate runs every frame, whether it's needed or not.
How
// Every AppEvent and its active callbacks. Look for unusually long lists.
console.log(nc.getAllEventRecipients());

// The per-frame events in detail
for (const name of ["fixedUpdate", "lateFixedUpdate", "screenUpdate", "lateScreenUpdate"]) {
    console.log(name, nc.appEvents[name].getRecipients().map(r => r.callbackName));
}
If something is still running after its job is done, remove it with removeCallback.
Best practice: tie callbacks to the enabled state
Rather than tracking by hand when an object should be updating, let its enabled state decide. Add an enabled-state-change callback that adds or removes the object's per-frame callbacks:
class Sparkles extends SceneObject {
    constructor(parent, name) {
        super(parent, name);
        this.addEnabledStateChangeCallback(this, "manageCallbacks");
        this.manageCallbacks(this.isEnabledWithInheritance);   // set up for the current state
    }
    manageCallbacks(isEnabled) {
        if (isEnabled) nc.appEvents.fixedUpdate.addCallback(this, "update");
        else nc.appEvents.fixedUpdate.removeCallback(this, "update");
    }
    update() {
        // per-frame work, which only runs while Sparkles is enabled
    }
}
The callback fires however the enabled state changes, including when an ancestor is disabled or enabled. It receives the overall state, ancestors included. So disabling a whole screen automatically stops every object inside it that uses this pattern.
Every enabled SceneObject costs CPU time on every frame, even when it can't be seen.
How
// true = count enabled objects only
console.log(nc.mainScene.getDescendants(true).length);
Check every Scene the game uses. Where the count is high, disable() whole branches that aren't visible, and enable() them when they are.
A Timeline left playing keeps working. If its Construct generates a Precomp, that Precomp keeps re-rendering too.
How
Check each Timeline's autoplayMode: loop means it never stops. When an animation is done, call stop() or pause(), or use playOnce() for animations that should play once.

this.intro.timelines.Idle.stop();A camera with autoRender on renders every frame, even when nothing it sees has changed.
How
For extra cameras and Precomps whose content rarely changes, set autoRender to false in code, then call render() yourself whenever the content changes. Leave it on for the main camera.
// A secondary camera whose view rarely changes
this.minimapCamera.autoRender = false;
this.minimapCamera.render();   // call again only when something changes

// Precomps take autoRender as a constructor argument.
// With false, it renders once when its content loads.
this.menu = new Precomp("MenuPrecomp", 1024, 1024, false);
this.menu.camera.render();   // re-render after the menu changes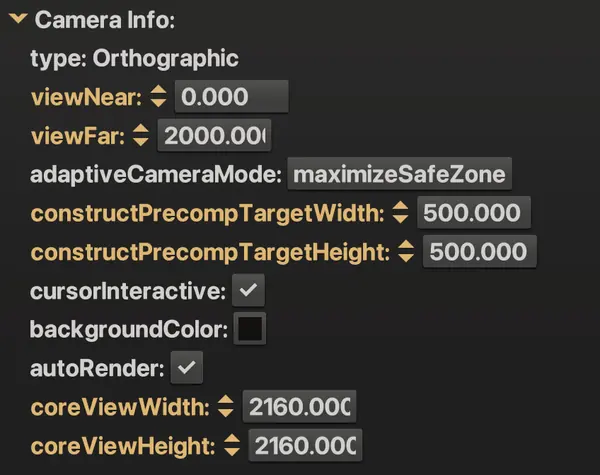
autoRender in the Object panel under Camera Info. The change isn't saved, so make it permanent in code.Pixels hidden under other pixels still cost texture lookups.
How
Where large graphics overlap, mask away the part that's covered. You'll find masking in the Object panel, and Manage → MaskGroups in the menu. Keep trimMode on hugged (the default) so transparent areas are never drawn.