 INCISOR®
See it happen
Before you start
Incisor® 2026.11.05.00.00.00 or later
Earlier versions don't have getProjectScreenShot or keyboard simulation. Use Incisor® menu → Check for Updates to update.
The command line turned on
In Application Settings, under security, tick enableCLI. It takes effect straight away.
Your project open in Incisor®
The agent works on the project in the Incisor® window you have open, so you can watch everything it does.
An agent that can run commands
Any AI agent that can run terminal commands and look at images works, such as Claude Code in VS Code.
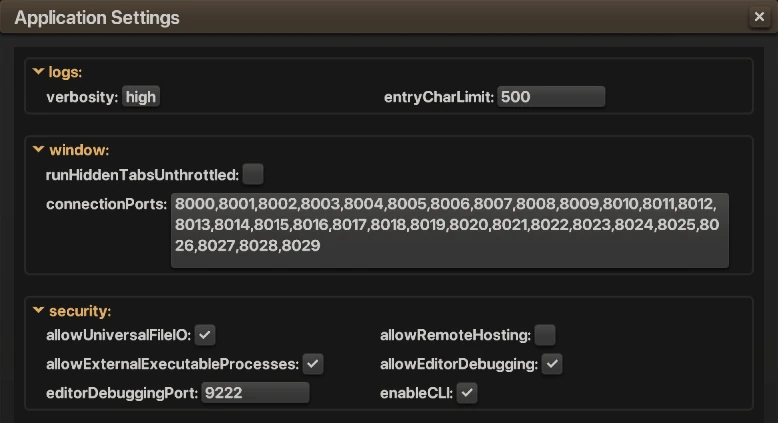
enableCLI is in the security group of Application Settings.Know the risk. With enableCLI on, any program on your computer can send commands to Incisor®, and a script can click anything a person can. Turn it on only on a machine you trust, and tell your agent what it may and may not change.
Give your agent the manual. Connect it to the Incisor® knowledge base, either through the public MCP server at https://mcp.incisordev.com/mcp or by downloading it from the Knowledge Base page at incisordev.com. Every command used here is described in full in the article Controlling Incisor® from the Command Line.
How it works
A test is the same three moves, repeated. Each move is one command.
See
A screenshot command saves a PNG of the project, or of the whole Incisor® tab. The agent opens the image and looks at it.
Act
runNceScript runs a short script that moves the cursor, clicks, or presses keys, exactly as a player would.
Check
The same script returns whatever the agent asks for, such as the current FlowState or the text in a meter. Another screenshot confirms it.
Two worlds: the inspector and your project
A script from runNceScript runs inside the inspector, the Incisor® window around your project. It gets one object, nce. Your running project is a separate world with its own nc, and nce has a doorway into it. Knowing which side you're on is the key to everything below.
| In a script | What it is | Use it to |
|---|---|---|
nce.projectNC | Your running project's nc | Do anything your own code does with nc: reach mainCamera, mainScene and flows, and simulate keys. |
nce.projectPR | Your running project's pr | Read your own properties and call your own functions. |
nce.mainCamera and nce.mainScene | The inspector's own camera and scene | Click inspector controls, such as the Run button in Live View. |
So a click on your game goes through nce.projectNC.mainCamera, and a click on the inspector goes through nce.mainCamera. The same split applies to keys: nce.projectNC.simulateKeyPress types in your project, and nce.simulateKeyPress types in the inspector.
Sending a script
The scripts in this article are plain JavaScript. To send one, it has to become the script text of a runNceScript command. On a Mac, save the script as a file and let jq build the command, so you never escape quotes by hand:
jq -n --rawfile script click.js \
  '{command:"runNceScript", projectPath:"'"$HOME"'/Desktop/MyProject", script:$script}' > command.json
rm -f answer.json
/Applications/Incisor.app/Contents/MacOS/Incisor --cli-file command.json --output answer.json
The answer is printed, and also saved in answer.json. The value the script returned is in result.value. On Windows the commands are the same, and the command line article lists where the executable is.
1 Run the project
Projects open stopped by default, and an agent can only see and click a project that's running. There's no command that runs a project, so the agent presses the Run button the way you do.
- Send
getSessionInfoand find your project inopenProjects. If it isn't listed, sendopenProject. If itsisRunningistrue, skip to step 2. - Send
getInspectorScreenShot. The answer gives the image'spath,widthandheight. In the image, find the Run button: the play icon under the words “project stopped”, or the small one at the left of the Live View header.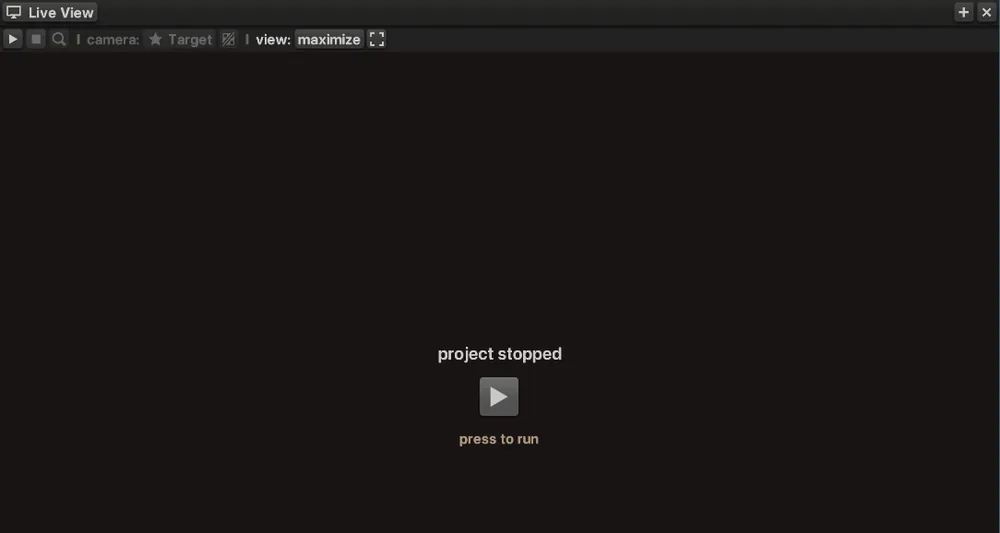
A stopped project in Live View. Either play button runs it. - Click that spot with the inspector's camera. A camera's view runs from −0.5 to 0.5 in each direction, with −0.5 at the left and bottom, so the script turns the pixel into a view position first.
Script: press Run
// From the getInspectorScreenShot answer, and where the Run button is in that image. const shot = { width: 1680, height: 1306 }; const runButton = { x: 1137, y: 492 }; const viewX = runButton.x / shot.width - 0.5; const viewY = 0.5 - runButton.y / shot.height; const camera = nce.mainCamera; // the inspector's camera camera.setCursorViewPosition(viewX, viewY, 0, true); camera.simulateCursorPressEvent(); camera.simulateCursorReleaseEvent(); - Send
getSessionInfoagain and confirmisRunningis nowtrue.
Skip this step entirely. Turn on runProjectOnOpen in Application Settings and projects start running as soon as they open.
2 See
There are two screenshot commands. Both save a PNG and answer with its path, width and height.
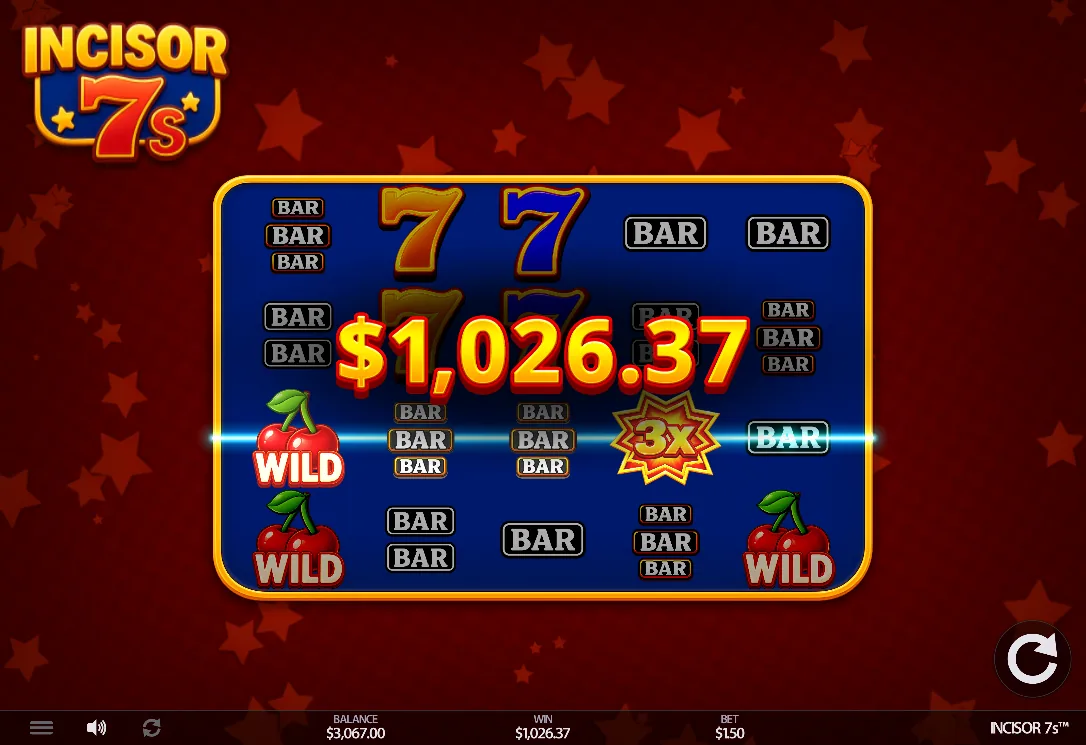
getProjectScreenShot: the project alone. Use it to judge what a player sees.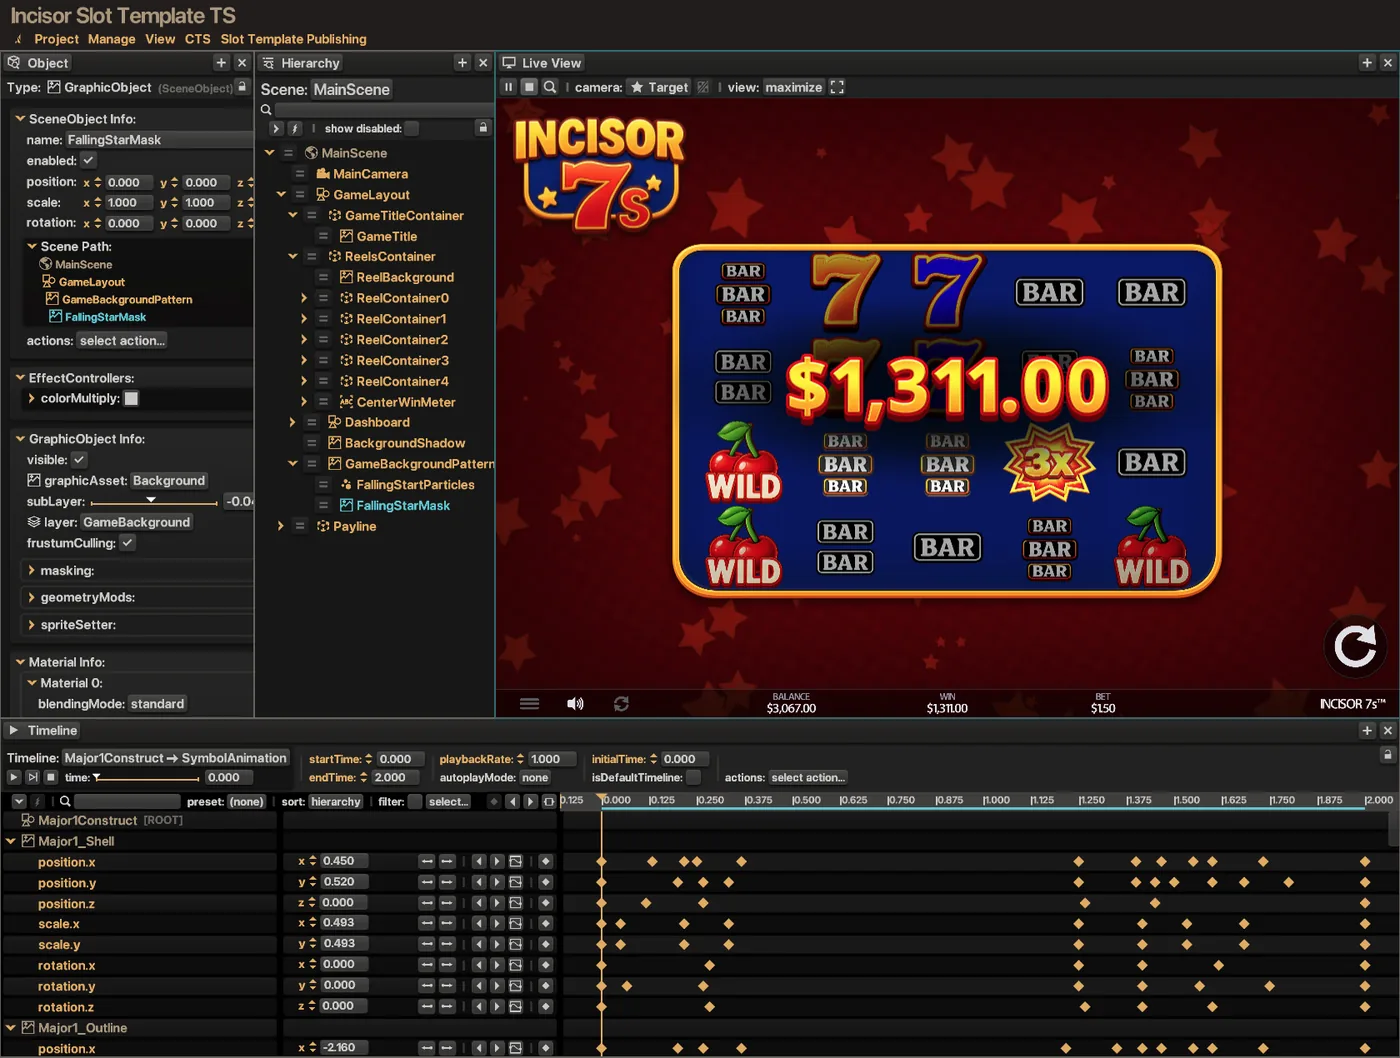
getInspectorScreenShot: the whole Incisor® tab. Use it to find inspector controls and read panels.{ "command": "getProjectScreenShot", "projectPath": "/Users/you/Desktop/MyProject" }{ "command": "getInspectorScreenShot", "projectPath": "/Users/you/Desktop/MyProject" }getProjectScreenShot needs the project to be running. If it isn't, the command fails with the error code notRunning.
3 Act
An agent could click by pixel position, but it doesn't have to guess. Your project's objects have names, and a script can ask any object where it is.
Find what can be clicked
const game = nce.projectNC;
return game.mainScene.getDescendants()
  .filter(o => o.type === 'Button')
.map(o => o.name);{
"ok": true,
"command": "runNceScript",
"result": { "value": ["MenuButton", "SoundButton", "SpinButton", "Autoplay Button"] }
}getDescendants() lists only enabled objects, so this is what's clickable right now. Call getDescendants(false) to include disabled objects too.
Click by name
const game = nce.projectNC, camera = game.mainCamera;
const target = game.mainScene.getDescendants().find(o => o.name === 'SpinButton');
if (!target) return { clicked: false, reason: 'SpinButton not found, or disabled' };

const view = target.getViewPosition(camera);
camera.setCursorViewPosition(view.x, view.y, 0, true);
const under = [...new Set(camera.getIntersections().map(i => i.sceneObject.name))];
camera.simulateCursorPressEvent();
camera.simulateCursorReleaseEvent();
return { clicked: true, under };{
"ok": true,
"command": "runNceScript",
"result": { "value": {
"clicked": true,
"under": ["BackgroundShadow", "GameBackgroundPattern", "FallingStarMask", "SpinButton"]
} }
}getViewPosition(camera)gives the object's position in that camera's view, ready to hand tosetCursorViewPosition. It keeps working when the window is resized, which pixel positions don't.getIntersections()lists everything under the cursor. Returning it asunderlets the agent confirm the click landed on the right thing, or spot that something is covering it.- Keep move, press and release together in one script, with no waiting in between.
Press keys
Keys are named the way the browser names them, such as 'a', 'Enter', 'ArrowLeft', or ' ' for the space bar.
const game = nce.projectNC;
game.simulateKeyPress(' ');        // press and release the space bar

game.simulateKeyDown('Shift');     // or hold a key down...
// ...do something while it's held...
game.simulateKeyUp('Shift');       // ...and let it go
These trigger your project's keyDown, keyUp and keyboardEvent AppEvents, and update nc.keyDownStates, just as a real key does.
Scroll and right-click
After placing the cursor, a camera can also send simulateCursorScrollEvent() and simulateContextMenuEvent(). To fire one callback on one Button directly, every Button has functions such as simulatePressCallback and simulateReleaseCallback.
4 Check
A screenshot shows what happened. A script can also say what happened, exactly, by returning your project's state. Scripts may use await, so one script can act, wait for the result, and report it.
const game = nce.projectNC, flow = game.flows.MainGameFlow;
const read = name => game.mainScene.getDescendants().find(o => o.name === name).string;
const wait = ms => new Promise(resolve => setTimeout(resolve, ms));
const before = read('BalanceMeter');

game.simulateKeyPress(' ');
await wait(500);
const spinning = () => ['StartGame', 'SpinReels'].includes(flow.currentFlowState.name);
while (spinning()) await wait(100);

return {
  state: flow.currentFlowState.name,
  before,
  balance: read('BalanceMeter'),
  win: read('WinMeter')
};{
"ok": true,
"command": "runNceScript",
"result": { "value": { "state": "GameIdle", "before": "$1,207.00", "balance": "$1,205.50", "win": "" } }
}That one answer proves the space bar started a spin, the reels stopped, the game returned to GameIdle, and the $1.50 bet came off the balance. Things worth returning:
- FlowStates:
nce.projectNC.flows.MainGameFlow.currentFlowState.namesays which phase the project is in. - What's on screen: a TextBox's
string, or any object'senabled,positionorgetViewPosition(camera). - Your own code: anything on
nce.projectPR. In the Slot Template,nce.projectPR.symbolReels.lengthreturns 5.
Return plain values such as names, numbers and text, not the objects themselves, because the answer is sent as JSON. Every answer also carries ok, an error with a code and message when something failed, and logs, the lines Incisor® logged while the command ran.
Example: playing a slot
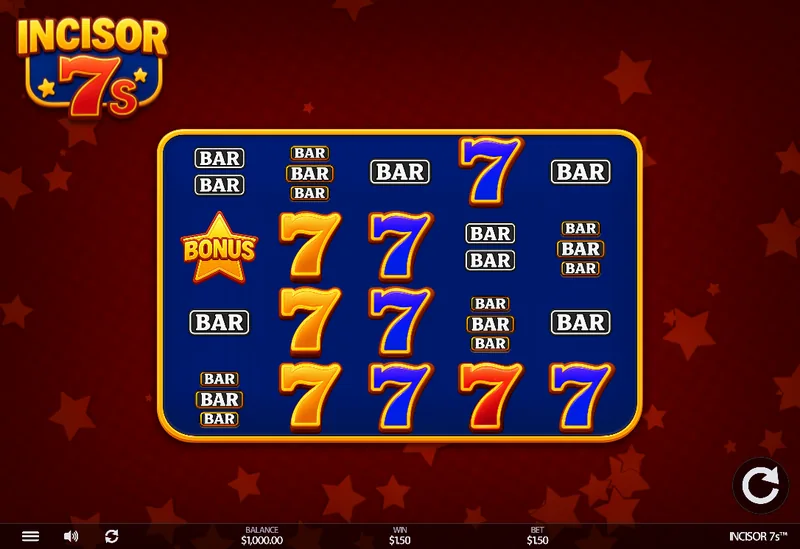
Here is the whole loop on the Incisor® Slot Template, which you can open from the Project Gallery. Every step is one command, and every image is a screenshot the agent took.
- Run it.
getSessionInfoshowsisRunningisfalse, so the agent takes an inspector screenshot, finds the play button, and clicks it withnce.mainCamera. - See it.
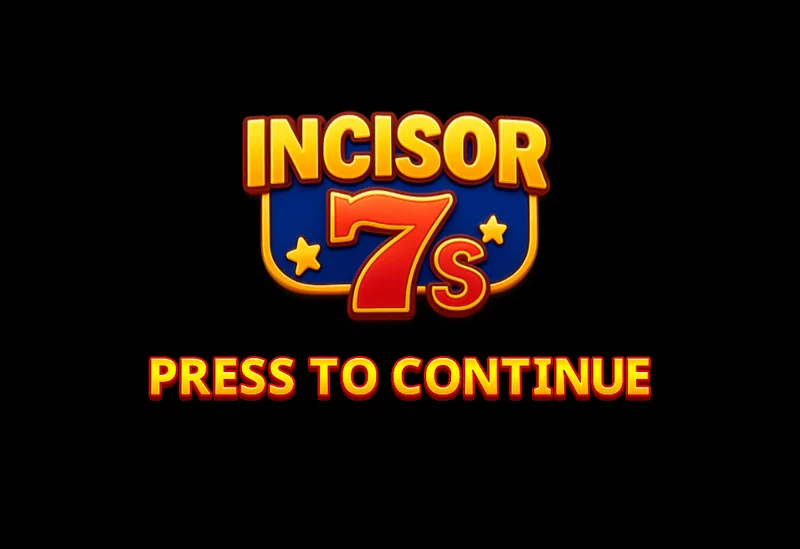
getProjectScreenShotshows the intro screen, and the Button list includesGameIntroBackground, a Button that covers the whole screen. - Click through. The agent clicks
GameIntroBackgroundby name. A script reports the FlowState changed fromGameIntrotoGameIdle, with a balance of $1,000.00 and a bet of $1.50. - Spin. The agent clicks
SpinButton, waits for the FlowState to leaveSpinReels, and reads the meters. After a losing spin the balance is $998.50, exactly one bet lower. - Catch a win. When the FlowState lands on
WinCelebration, the agent takes a screenshot and compares the number on screen with theWinMetertext.
From here an agent can go wherever you point it: open the menu, try autoplay, hammer the spin button mid-spin, or play 200 spins and confirm the balance always adds up.
A briefing for your agent
Paste this into your agent, with your own paths, then tell it what to test.
You can test my Incisor project through the Incisor command line (CLI).

SETUP
- Incisor executable: /Applications/Incisor.app/Contents/MacOS/Incisor
  Use the copy of Incisor that is already running. On a Mac, check with:
  pgrep -fl "Incisor.app/Contents/MacOS/Incisor"
- Project folder: /Users/you/Desktop/MyProject
- Reference: the article "Controlling Incisor from the Command Line" at
  https://www.incisordev.com/articles/incisor-command-line/index.html
  and the Incisor knowledge base (MCP server: https://mcp.incisordev.com/mcp).

RUNNING A COMMAND
- Write the command as JSON in a file, then run:
  <executable> --cli-file command.json --output answer.json
- In a VS Code or Claude Code terminal, put this in front: env -u ELECTRON_RUN_AS_NODE
- Run one command at a time. Delete answer.json before each command.
- Check "ok" and "error" in every answer. A script's return value is in result.value.

THE LOOP
1. Run: send getSessionInfo and find the project in openProjects. If isRunning is
   false, send getInspectorScreenShot, find the Run (play) button in Live View, and
   click that pixel with nce.mainCamera:
   viewX = pixelX / width - 0.5, viewY = 0.5 - pixelY / height.
2. See: send getProjectScreenShot (the project alone) or getInspectorScreenShot
   (the whole Incisor tab), then open the image and look at it.
3. Act: send runNceScript. In the script, nce.projectNC is the running project's nc
   and nce.projectPR is its pr. To click, find the object by name in
   nce.projectNC.mainScene.getDescendants(), get its position with
   getViewPosition(camera), then call camera.setCursorViewPosition(x, y, 0, true),
   camera.simulateCursorPressEvent() and camera.simulateCursorReleaseEvent() back
   to back, where camera is nce.projectNC.mainCamera.
   To press a key, call nce.projectNC.simulateKeyPress(key).
4. Check: return state from the script (FlowState names, TextBox strings, positions),
   read "logs", and take another screenshot.

RULES
- Never declare a variable named nc or pr in a script. Those names are taken.
- Find project objects by name, not by pixel position.
- Wait inside a script with await, and raise timeoutSeconds for long scripts.
- Return plain values (names, numbers, text), not objects.
- Tell me what you did, what you saw, and anything that looks wrong.
- Don't change any project files unless I ask.
Good to know
ncandprare taken. Inside a script those two names are reserved, so declaringconst pr = nce.projectPRfails. Pick other names, such asgame.- Clicks aim at an object's position.
getViewPositionreturns where the object itself sits, which is normally the middle of a Button. If a Button's graphic is drawn away from its position, checkunderand adjust. - Inspector controls go by pixel. The inspector's own objects have internal names that change between versions, so find inspector controls in a
getInspectorScreenShotimage and click by position. Take a new screenshot after the window is resized, because the positions move. - Long waits need a longer timeout.
runNceScriptstops after 30 seconds unless the command includes a largertimeoutSeconds. - A code change refreshes the project. If the agent edits your code, check
isRunningagain and look up objects again before the next step. - Hidden tabs slow down. A project in a tab that isn't showing is throttled unless
runHiddenTabsUnthrottledis on in Application Settings. Both screenshot commands bring the tab forward, and so doesfocusTab.
Troubleshooting
A command hangs, or a second Incisor® starts
The command went to a different copy of Incisor® than the one that's open, for example /Applications/Incisor.app when the running copy is on the Desktop. Always use the executable inside the copy that's running. On a Mac, this shows which one that is:
pgrep -fl "Incisor.app/Contents/MacOS/Incisor"The answer is from the previous command
An old answer file was still at the --output path. Delete it before each command, or use a new file name each time.
notRunning
The project is stopped. Press Run as shown in step 1, or turn on runProjectOnOpen.
Identifier 'pr' has already been declared
The script declared a variable named pr or nc. Rename it.
The click did nothing
- Move, press and release are in the same script, with no
awaitbetween them. - The click used the right camera:
nce.projectNC.mainCamerafor your project,nce.mainCamerafor the inspector. - The target is in the
underlist, and nothing that takes clicks is covering it. - The project is in a state that accepts the click. Return the FlowState to find out.
timeout: command not found
macOS has no timeout command. Put timeoutSeconds in the command instead.
bad option: --cli
The terminal has ELECTRON_RUN_AS_NODE set, which VS Code and Claude Code do. Put env -u ELECTRON_RUN_AS_NODE in front of the command on a Mac. The command line article covers Windows.